
Step 1.
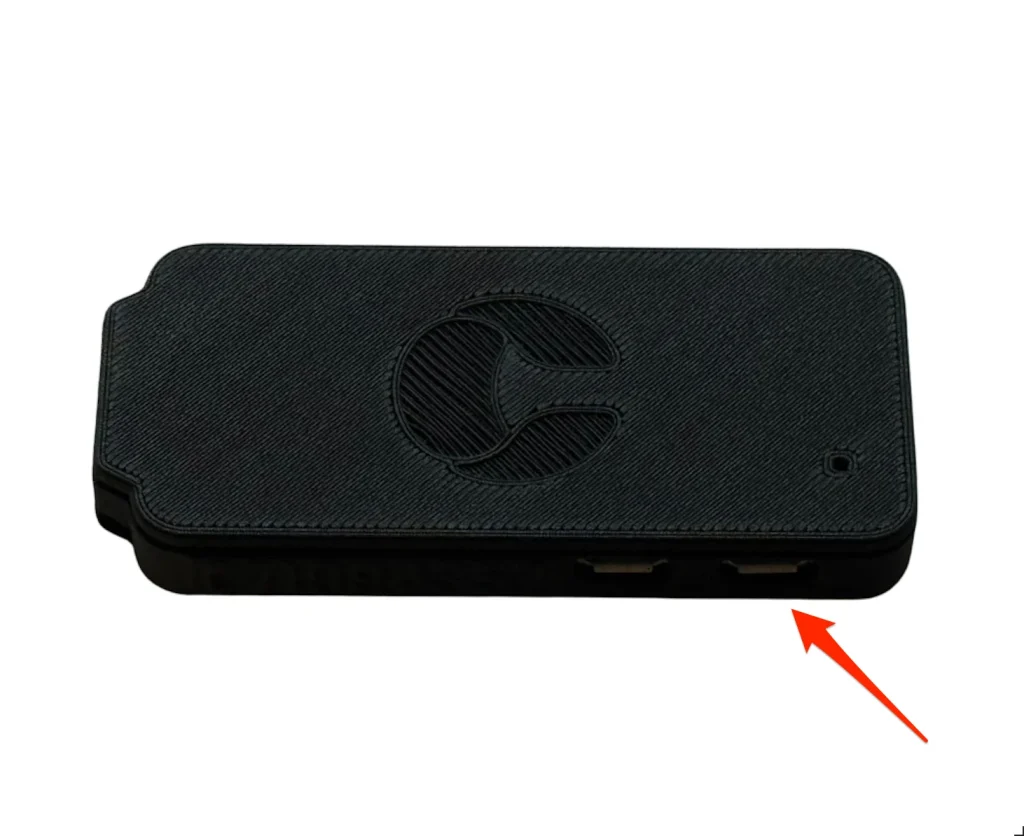
Connect power to your dongle in the right-hand port. There is a small lightning symbol above the port.
Step 2.
When the dongle is connected to power for the first time, it will start a
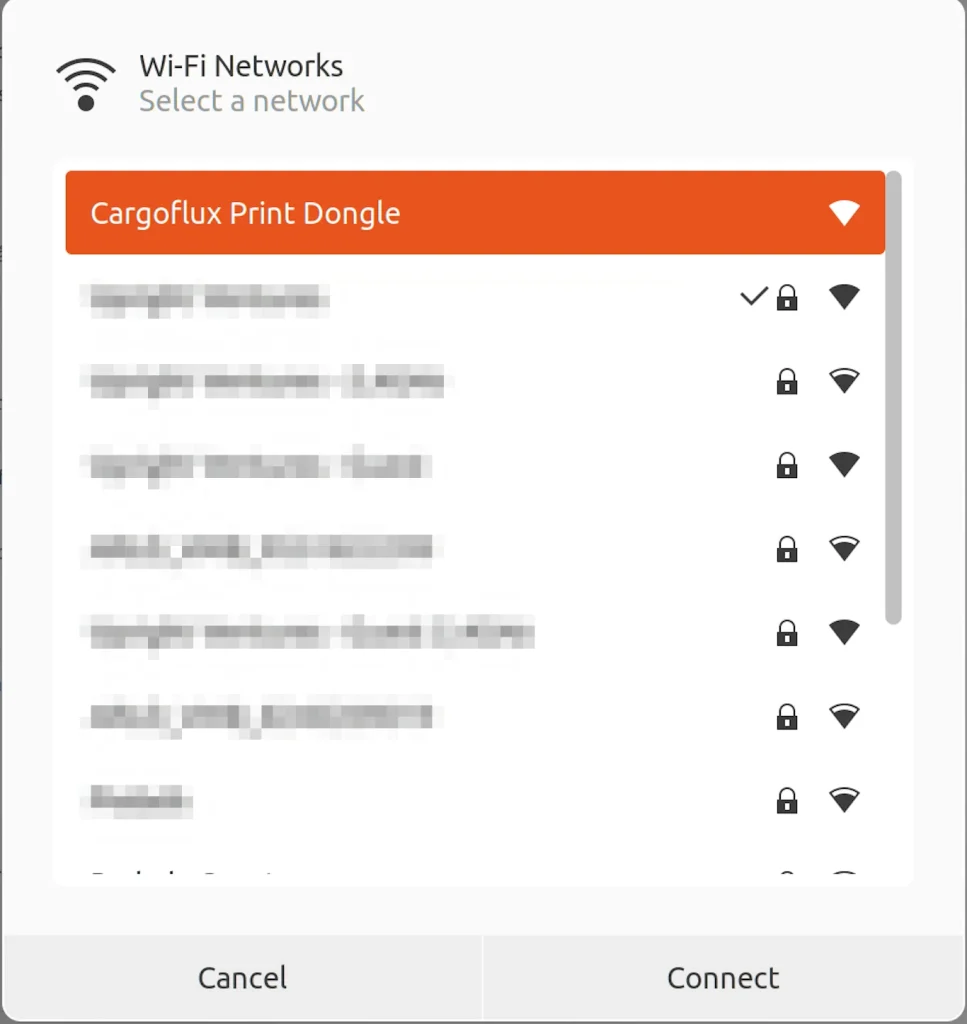
Wi-Fi hotspot. The hotspot name for the dongle is: Cargoflux Print Dongle.
Connect to the Wi-Fi hotspot by clicking Connect.
Step 3.
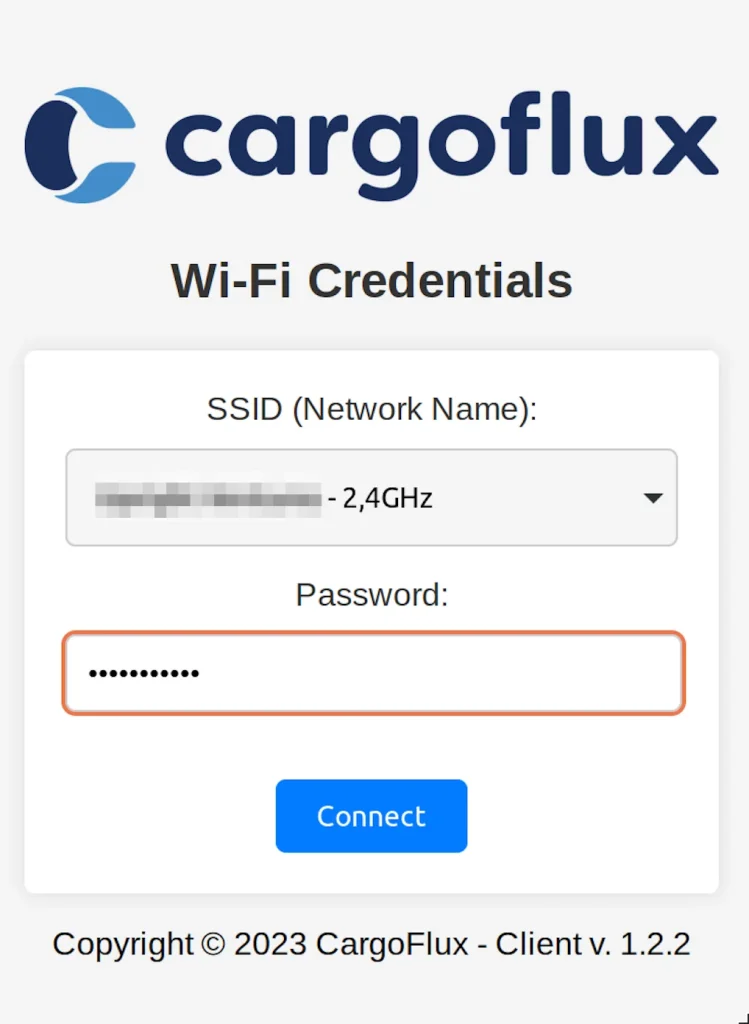
Once you have connected to the hotspot, a new browser window will open automatically. See the image below as an example.
Select the wireless network the device should use to communicate with the CF dongle.
Enter your Wi-Fi password.
When you press “connect”, the device will restart and connect to the Wi-Fi you specified.
Step 4.
1. Select “Settings” in your Cargoflux portal and then click “Label Print”.
2. Connect your printer to the dongle.
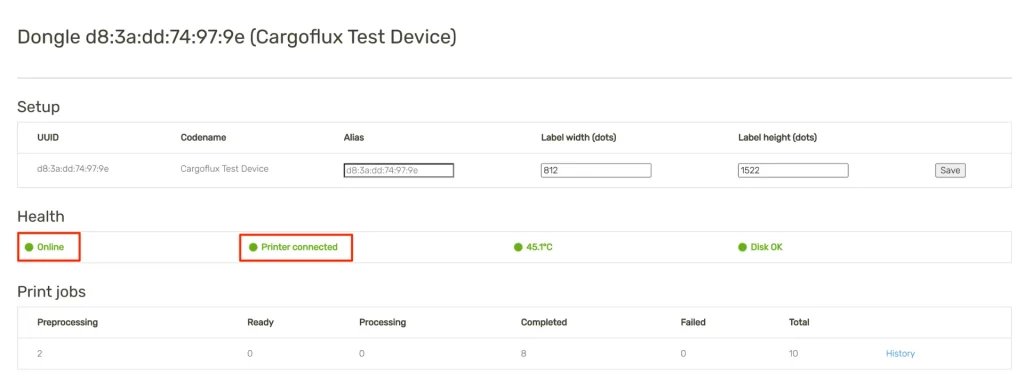
3. Wait 2 minutes and check whether the dongle appears.
4. Verify that it says “Online” and “Printer Connected”. This way, you will know that everything is configured correctly.
5. If you want to give the dongle a different name or change the label size, you can also do so here.
Note: If the dongle does not appear, check whether a new Wi-Fi hotspot has been created. If this does not resolve the issue,
try restarting the dongle by unplugging the power cable, waiting 30 seconds, and plugging it back in.


